Thursday, December 24, 2020

Dice Storage & Transport Design incl TTRPG play, dice towers, trays, etc.

Inspired by r/DicePorn/ and dice storage on Esty. I thought I would run a design experiment on what would make the best portable dice and TTRPG storage folio with an integrated dice tower.

My initial interest was perked and the array of options astounding. I focused on a design but at the price I question would it really do everything I wanted. Ans there were some niggling questions. So it lead down this path.

  • I compared it to what I currently have for dice storage which are two Sistema 1.7L plastic containers. The box I was interested in was smaller than these ....
    So I wondered if I could make a bigger version, say the same size to fit with my existing containers.
  • I started to layout the design in 2d to get a feel for a layout
  • I next extruded my 2d design to 3d so I could generate some reference dimensions to check against my lego prototype.

  • When I was happy with the layout. I build a Lego prototype to test my dice mechanism and storage potential. The original design looked a bit narrow at about 25mm clearance in the storage and dice shoot, so I wanted to %test how 40mm would go.


  • Building a prototype was a really good exploration. especially testing but the 40mm and 25mm slots. It does not sound like much difference but significant differences in usability were found.
    • 40mm is easier to load in a handful of dice.
    • 25mm is a more compact feel, more secure dice storage and works okay for feeding in one dice at a time rather than a handful.
    • leaving a side of my dice tray allows a drive tower to feed into the tray.


    40mm Wide test
    25mm Wide Test
     
  • I also did a quick study of how many dice can fit in a 100mm equilateral triangle, 25mm high. Two sets apparently, almost in one layer but definitely within 25mm. All of my storage slots are bigger then this 100mm triangle.


  • Then I saw a folio and wondered if I could fit a character sheet In somewhere. The only option really is somethign around A5 size sitting on top of the storage with some clearance or recessed into the lid. Any clearance would have to not allow dice to fall in from the dice shoot.
This left me in a bit of a quandary as I like the idea of having a complete all in one box of tricks.  This meant I needed to dive into the design a bit more. My next three steps;
  • Think about design patters and what makes a good all in one RPG box of tricks.
  • Document where I have gotten to in my thinking
  • Seek input to consider things I have overlooked,
Don't forget to scroll down and see the features I think are important in considering a Box of Tricks.

Design Patterns
A quick visual summary and some initial thoughts I had on the various tropes.


    Pattern
    Thoughts
    Image
    Simple Tray There is something to be said for the utility of a simple nested box.
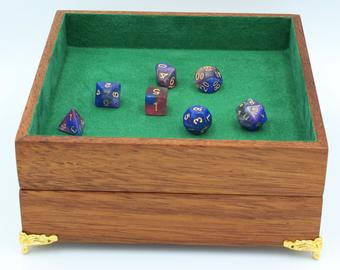
    Pen Case I like the minimalist nature of this ... it might be channelling some old school pencil case memorties.
    Slotted Tray Pencil case on steroids.
    Dice Box For the totally organised
    Dice Case The minimalist solution again.
    Modular The organised minimalist?
    Rolled Folio Olde world charm but nos sure if overly useful. Might work well with a dice towner in a  backpack.
    Folio Screen Screen with built-in dice towers
    Dice Tower Portable. Folding design. Some storage.
    Storage & Dice Tower Removable multipurpose tray. Built-in dice tower.
    Hex Slotted Individual compartments.
    Octogon with Dice Tray Interal perimeter slot for dice storage surrounding a central tray area. About 9x9"outside. 1x1/2"slot around 6x6x1" tray. 100+ dice Storage. Note only 33 around the outer slot.

So what are the design features I like?

  • Explicit design features
    • dice storage with integrated dice tower.
      • single layer. single dice pockets, single dice set row
      • dice capture/containment, tray?
    • Other item storage. Pens, eraser, mobile phone stand, etc
    • storage for papers.
      • character sheets
      • note pad
      • writing surface>
    • Other Features
      • trackers, hitpoints, initiative.
      • Whiteboard areas
      • Miniatures
      • Status indicators
    • Materials
      • Solid wood
      • Laminates
      • Plastic
      • Metal?
      • Other features
        • Rare earth magnets
        • decorative hardware, latches, hinges, etc
        • felt, cloth, foam
  • Implicit design features
    • Lightweight
    • Does it protect dice from damage?
    • robust, wear resistant ?
    • Modular 
      • remove the bits your don't need.
      • customise the layout of compartments.
    • Small enough as to not impact other players
    • Noise ... pleasant or annoying?
    • Feel of materials. Plesant or cheap.
    • Sustainability
      • Economical use of sustainable materials
      • Ethical labour
      • Local sourced, slow transport
      • Ethically run free-trade business


Thursday, December 3, 2020

Catan Hexatower Design Experiment

I was considering purchasing the new Catan Hexatower dice tower by Gamegenic. 

But I had a few questions.

  • Would it roll a standard set of polyhedral?
  • How many dice can fit inside it?
  • How big is it ???
  • Would it work with my dice tray?
I googled around and found the dimensions on the product page (102 x 89 x 41mm) and the general consensus was Catan dice were about 20mm which is bigger than most polyhedral dice so I thought it should work okay ... but it still niggled me.

Then I thought.... what do the internals look like. My first thought was it might just work with one internal slot and the hexagon slope at the bottom. I started to draw it in Inkscape to check the dimensions. I guessed a 51mm sided hexagon should be 102mm one way and possibly 89mm the other way. This was confirmed by drawing it up in Inkscape and then I thought... I could just keep going and make this out of cardboard.


Next, I just marked it out on some cardboard and cut out with a scalpel. I added another tab for the internal slot with the same dimensions as the sides. I scored the inside of the folds to make it easier to fold up and just used sticky tape to hold it together.


The first experiment found that the bottom slope of the hexagon was not enough to eject the rolled dice. But then I found the adding a second longer slot from the back of the hex to the mouth was enough to eject the dice.

So all of my questions pretty much answered. I could actually fit 3 sets of dice inside the hex. The dice rolled freely through the hex if you only used 3-5 at a time. It worked okay with my dice tray. The dice pictured below were all rolled 3 at a time consecutively without moving them after they landed.


The only hassle I had with the design experiment was that it is a bit light and unstable. I can only presume the real Hexatown has some ballast in the base which could be easily hidden between the exit slot and base. The external wrapping band might improve stability too. 

Thursday, November 12, 2020

Graphviz Syntax Highlighting and Preview with Notepad++

I have about a 50/50 strike rate on getting Graphviz DOT notation correct at any given moment. This drastically reduces if I want the correct syntax and a graph looking like the way I want it to look!!! [edit] Came across this good guide to Graphviz DOT notation.

For a while, I have used online viewers to check my output, it was something of a clunky workflow. [edit] I did some reverse engineering of the code and worked out you can pass a URL parameter to specify the engine. 

https://dreampuf.github.io/GraphvizOnline/?engine=<name>#<graph data>
where <name> = dot, circo, fdp, neato, osage, or twopi. eg from DOT to CIRCO.

What I needed was something more sophisticated to;

  • Version Control - Notepad++ Verbose Backup with date and time of each save.
  • Correct Syntax - Notepad++ Graphviz user defined language
  • Check the output - Notepad++ preview plugin which launches Graphviz
    (a specific version to download as its a bit hard to find graphviz-2.44.1-win32.zip)
You can follow the detailed instructions but this is what I did.
  1.  Turn on Verbose Backup in  Settings|Preferences|Backup and set a backup directory.
  2. Import graphviz-notepad-udl.xml via the User Defined Language dialog which is accessible via the to Language|User Defined Lanuage|Define Your Language menu. After importing, I changed the file extension to DOT (my personal preference for extension) and you select Graphviz from the User Language drop-down Listbox.
  3. Download the correct 32 or 64bit DLL, depending on if you are using 32 or 64 bit Notepad++. Import the plugin DLL via the menu Settings|Import|Import Plugin(s). Note - the Notepad++ plugin install instructions on the Github site are out of date.
  4. The first time you press F9 the preview you will have to point to the command line tool Graphviz\Bin directory if it cannot find it on your PATH environment variable. I just unzipped the  graphviz-2.44.1-win32.zip to a directory.
This should give you colour coded syntax and access to a Graphviz preview via the F9 key.


Monday, July 20, 2020

What to do with a Adafruit NeoTrellis M4?

I have a NeoTrellis winging its way to me. It has an amazing amount of capability including a 120 MHz Microprocessor, 2 x 12 bit A/D, XYZ accelerometer and 8 x 4 RGB push button matrix.
The question is what to do with it. My initial intention was to use it as a MIDI controller but the onboard sound production makes me think it should really be an instrument. This could be quite fun in a constrained minimalist sort of way. I think the main problem is that there is only 8MB of flash storage onboard and 512kb of flash ram and 192kb SRAM.

But that made me think ... what about what they used to do on the Amiga. That sounded great and should be fairly resource light.

This lead me down a nostalgic rabbit hole that turned up two gems.
  • ProTracker has been reborn as OpenMPT which can load old Amiga MOD files, edit, extract MIDI and sample or stream the file to modern audio formats.
  • The Wayback Machine has 18,000 MOD files in an 4 ISO's (CD1, CD2, CD3, CD4)
I think I can do something with this ... not exactly sure yet but I think some sort of retro 8bit MOD player should be possible with a extension goal of making it a stand alone Tracker type sequencer.

Tuesday, July 14, 2020

Zynthian Kitless and Hopefully Headless

Introduction

Well what can I say about Zynthian except wow. This is the open platform Synth users have been looking for;
  • Multiple Synth Engines
  • LV2 effects 
  • Audio and MIDI recording
  • MIDI routing
  • and much more.
But hang on .... before you can say RPi's don't cost 285.00€. Sure you can DIY but I think you would be pushing it to source all the components let alone come up with an as neat a solution. Its horses for courses whether you are looking for your next electronics project or a new instrument (some assembly required!?!).

So where am I at with it. I am interest in the kit but I want to check out the functionality now.

So that means I need to set up an image on my RPi 4 (and 3B+) to run with a mouse, HDMI TV (with digital audio). I want this to work on my wifi network. Ultimately I would like to see if I can run this headless over wifi on a RPi Zero with a USB Sound card. This looks possible with the command-line UI over SSH.

Zythian Kitless on Raspberry Pi 4/3B+

Following the wiki on getting the software.
  1. Downloaded the image. 6.3Gb download. 12Gb expanded onto SD Card.
  2. Flashed using Balena Etcher onto at a fast (100Mb/s) SD Card with a min 16Gb capacity .
  3. Set up RPi with mouse and HDMI connected.
  4. Connect Ethernet cable between your notebook and the RPi
  5. Insert SD card and power up.
    Note: You should see some typical RPi linux booting text and and then to a blank screen. It probably will crash and seem stuck in a rebooting loop but do not worry. WebConf-UI is running in the background and  is up enough to change the hardware settings to stop the reboot loop. I got this from the forum. Here and here.
  6. Connect to the WebConf-UI http://zynthian.local/
  7. The web config tool will load and ask for the admin password. The default password is "raspberry".
  8. You need to change the default hardware to the following either from clicking on items in the main page or the Hardware drop down menu or the links as below.
  9. Go to http://zynthian.local/hw-kit and change to a CUSTOM kit (last option).
  10. Go to http://zynthian.local/hw-audio and change to RBPi On-Board Audio.
  11. Go to http://zynthian.local/hw-display and change to Generic Hdmi Display.
  12. Go to http://zynthian.local/hw-wiring and change to Dummies.
  13. You can also set up wifi at this time under the System dropdown menu or go to http://zynthian.local/sys-wifi.
This got me to this with a slightly off screen UI. I think this is an issue with my monitor. [solved] it was the TV screen fitting on my Samsung TV that was over scanning.


You can see the UI dials left and right that can be manipulated via mouse. You have a mous cursor that you can use to click through the menus. The top black bar is a Back Button. To the right you can see a green bar which can be CPU or Audio Level (via WebConf-UI  under the Interface drop down menu UI Options Http://zynthian.local/ui-options).

I was able to get sound out over the HDMI to the TV by setting up a Sound Engine Layer connected to MIDI Ch 1 and connecting my MIDI keyboard to the USB on the RPi.

On Going Headless

My first pass (yes I am upto about 5 so far) at building for my RPi4 I just winged its and put WPA_SUPPLICANT.conf on the SD card. It conneted to the network. I was able to access http://zynthian.local via wifi from my notebook and made the changes to WEBCONF to support it working without the default hardware.

This worked ONCE! And I haven't been able to reproduce this!

I think this is more an issue with my home network as my workshop area only has 75% SNIR. [not the real reason]. I think it was actually my WPA_SUPPLICANT.conf upset the Zynthian config ... I need to sort out a bit more what is going on with WPA_SUPPLICANT and the Zynthian wifi.

Stuff that Geeky Headless Stuff .. Lets Play

Might have something to do with my personality but I got way distracted this afternoon playing with my new shiny synth. Oh if you want to be boring ... there are user guides too.
  • Step sequencer with a song mode!
  • Load up the Special Layer Mod-UI so you can play with a virtual pedal board from your browser
  • Increase the font size so you can read it without your glasses on. http://zynthian.local/ui-options

Other More Boring Things I have Learned

  • Raspberry Pi Ethernet socket can automatically crossover (as well as normal) so you can wire LAN directly between a notebook or two Raspberry Pi's with a normal cable.
  • When a desktop is too big for the TV its proably overscan or sizing on the TV that is causing grief ... not the computer.
  • WPA_SUPPLICANT.conf can break wifi on Linux ...  gotta love it!
  • In the main menu. ALSA Mixer can fix up the PCM gain on the RPi internal audio (thanks here)